Showing posts with label TAG. Show all posts

Friday, 19 May 2017

Airbrushing and Masking Miniatures - Plus Blue Steel NMM Technique


Masking, is there anything worse? It just never seems to go quite right, and no matter what fancy product you use it can be a bit of a battleground. Most of the time, it tends to go two ways; you either mask so well that you end up peeling the paint off when you take the tape away, or you do it too tentatively and end up with overspray and a bad finish.

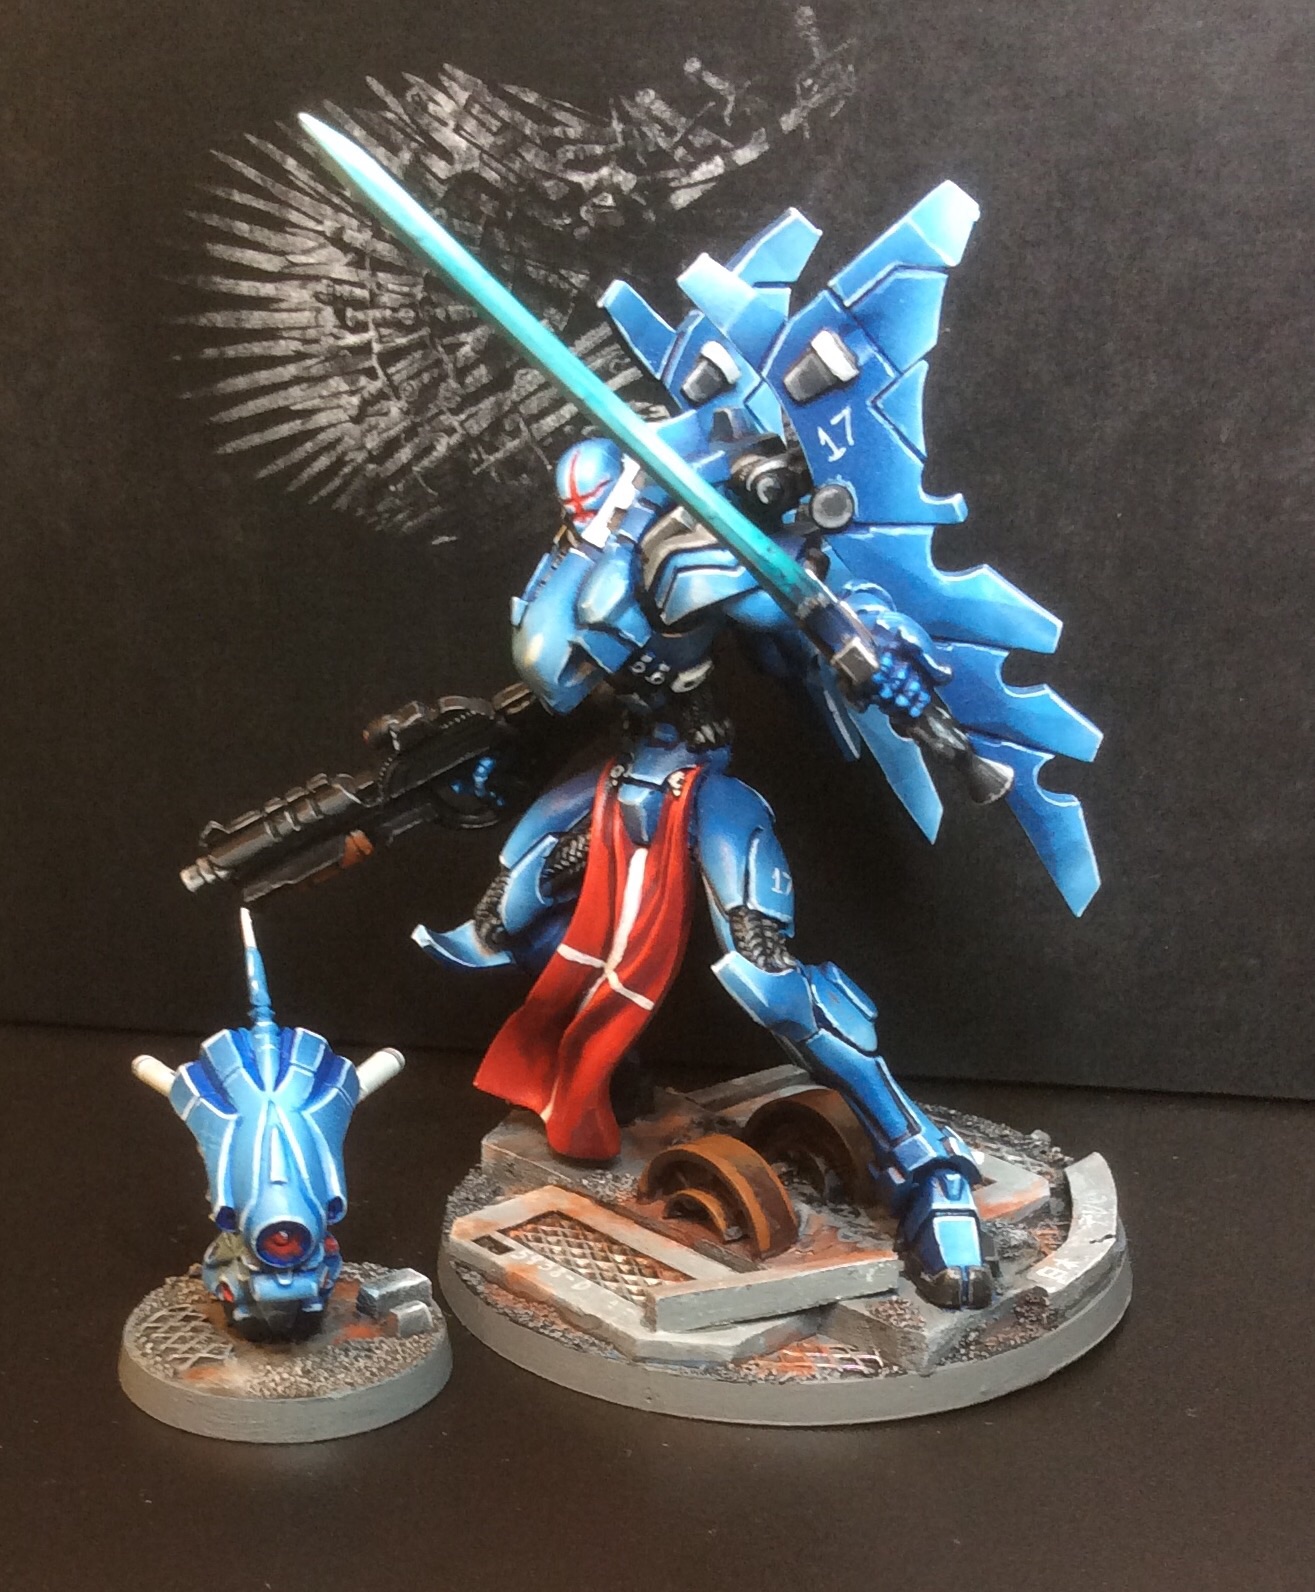
Despite these concerns, I've been working on a technique that gives good coverage and protection, whilst not doing any damage. I managed to try it out this weekend on my Infinity Guijia, and it worked wonders.

I started by painting the orange armour sections with the airbrush (as orange is the main colour I didn't do any masking). I completely finished these by adding in edge highlights with the standard brush, and when I was happy, I gave them a coat of Vallejo Satin Varnish. This has the same lustre as the regular paint, but helps protect it from the next steps (It is also very important for my secret overspray defence technique, but more on that later). I painted in the areas that I wanted to do in Steel NMM in black with a regular brush as I was going to add a blend with various greys to them.


At this point, I usually find that something strange will happen. I'll be sitting there at my painting table and the airbrush will start to talk. It'll eye up the masking tape and say "Hey buddy, I thought you were a real man ... you don't need to mask anything, I wouldn't overspray on you". Try not to listen though - it's a trick. Even when it brings up all the progress you've made, and how nice your last mini was...

I find that Tamiya make good masking tape. It's pretty much as simple as that. I've used a few different brands, but it's the only one I trust not to weld itself on and come off with all of my hard work stuck to it. I have the varnish too for protection and I try not to leave it on there too long (an hour or so should be enough time to get what I need done). It does take a bit of time to get the tape on there and get coverage that you're happy with, but you really can't cut any corners. If you only need to mask the model to paint one thing that sticks out, I recommend using some plastic wrap like you used to have for your sandwiches, as the coverage is good and fast and I've never had any problems with peeling it off.

Blue-Steel NMM (Non Metallic Metal)

Top tip for mixing paint for the airbrush - mix it separately, not in the airbrush's cup and the consistency is right when it runs freely.


For the blue steel effect, I painted 4 layers over the black with the airbrush:

  1. A general highlight with a mix of black, Vallejo Dark Prussian Blue and white. This is a pretty dark mix, and the blue seems to help get some interest into it as well as aids the non metallic metal appearance.
  2. I followed up with another highlight, mixing in a greater quantity of white this time, and focusing on the upper areas and places that seemed like they should be reflective.
  3. I finished up with 2 highlight layers of pure white. The reason for the second coat was to try to intensify the "shine" that I was going for.
This was the colour that I used for the original mix (although this picture is from when I was painting it with the normal brush later)

After that, I painted his sword in blue, and then it was time for the moment of truth; peeling the tape. Luckily, thanks to all that preparation, it went rather well.


Even with all of that masking, I still had a little overspray on some of the orange parts to contend with. This was quite noticeable on the pilot's arm, where the end had got speckled with white unintentionally. Luckily though, I was prepared to deal with it, and that varnish was a real time saver.

Dealing with Overspray


Remember that varnish? If you're looking to make this work, I hope you applied it!

Like I said, this only works if you added varnish during the earlier step. This is because it protects the paint from what I'm about to do. Working quickly, I grab my airbrush cleaning fluid. This stuff is designed to break down paint in the mechanism, so it'll eat the paint right off. I take a fairly soft old brush, dip it into the fluid and then apply it directly to the overspray. I rub it for about 10 seconds, or until I see it dissolve and then wash the whole area out with a lot of clean water. I want to make sure that there won't be any cleaning solution left as I have no idea what it would do, so I recommend a lot of water (so obviously only do this once the paint you were applying is dry!).


Finishing Up


After a delicate scrubbing, the few little bits of overspray were gone and the mini was ready for the final steps. In this instance, that meant painting in some of the steel bits that I couldn't reach with the airbrush and then finishing up the steel with a final shade in the recesses and sharp highlight to get a bit more shine on it. For these steps, I used pure black and pure white respectively.


Thursday, 18 May 2017

Guijia TAG and Pilot - Almost Finished!


This might be my finest work yet. Occasionally, when painting a miniature I have a jump forward in technique. This time, it came when I was painting the grey NMM steel on this Guijia (don't ask me how you pronounce that). Handily, I took a few pictures during the process, so I should be able to talk a bit more about it later. 


One of the things that I really progressed in was actually not what you'd expect. Oddly, I improved my technique when masking the model, which in turn allowed me to go further with the airbrush and push the application to 3 separate blended colors - namely, the orange armour, steel, and blue sword. I still haven't finished the base, but I was so excited that I couldn't wait to take a few pictures. 


The pilot is cool too. I'm not sure how often I'll actually get to see her in the game, but I like the mini. She reminds me of Evangellion or something. I struggled a bit with her face though. I might have to go back and make some corrections to her later. Faces can still feel a bit like a gamble; you never quite now how it'll turn out!


The orange is even more saturated this time too, thanks to an additional shade of red that I added to make it pop even more. I love the design on this thing too. It really screams Gundam, which is always a good thing in a sci-if robot.


I was particularly happy with the calf parts as the gave me a nice big space to work up the NMM. The surprising part about this thing is  that even now, I've probably only spent 5 hours on it over one weekend, which for the quality of the job is pretty damn good. Unfortunately, my speed  is also sort of a curse, as I lack the patience when it comes to actual competitions. I guess I'll live with it, as the trade-off is having a lot of really nice minis!


The other side. I didn't want to put too many layers into the airbrush for the steel looking NMM as I wasn't sure how it would turn out. I might layer the highlights more next time I use this technique to push the contrast.


Like I said earlier, I'll post more about the painting techniques later. For now, I'm just gonna take a break; painting this intensely sure is tiring!


Tuesday, 30 August 2016

PanOceania Seraph and Auxbot - Plus Group Shots!


To finish-off my PanOceania faction for the moment I've painted up my Seraph's Auxbot. Not only did it come out quite well for just an hour or so of work (I'd basecoated it with the airbrush already), but it also means I can also legally use the Seraph now!


I was so excited to finish them off that I decided to take a few group shots to celebrate.


Tuesday, 12 April 2016

FoxHunter KMS Airbrush Review - A Complete Airbrush kit for £60 ($90)!


I've been interested in airbrushing miniatures for quite a long time, but what was holding me back was the start-up cost. Airbrushes can be expensive and I really didn't want to drop a lot of money on something that I might not like or use without being able to have a bit of a go and test the waters.

After buying a copy of Angel Giraldez's "How to Paint Miniatures from A-Z" I was inspired by the quality of his work - before that book I thought the only thing that could be airbrushed with good results was Eldar vehicles and power weapons! I was determined to have a go myself, but I didn't want to go into it and drop a ton of money on kit right off the bat.

I had a look on a few retailers and saw that Amazon were doing a full kit; compressor, airbrushes and hose for £60 ($90). At first I was sceptical, but the reviews were quite positive, so I thought "why not" and took a chance by ordering one.


The complete FoxHunter KMS kit.


The next day the whole thing arrived and I began to experiment. The first thing I did was set it up and then I began by spraying water just to get a feel for it. The pressure can be adjusted on the compressor - I've found that 1.8-2 bar is about right for miniatures as it gives a gentle spray that won't blast out too much paint in one go. The only thing is that as you spray the pressure will go down as the compressor is a bit budget. The way to get around this is to set it higher than you need and then spray air till the pressure stabilises to a steady flow at the pressure you want - then you can paint away! 

In the box you get 2 airbrushes - one bottle fed and one gravity fed. The gravity fed one is the one you want for miniatures. The needle size is 0.3mm which is about right for larger models (Say Daemon Prince Size) and vehicles of all sizes. You can basecoat miniatures of any size with it, but it won't have the precision for highlighting etc at a small scale. 

The other absolute essentials are Airbrush thinner and Airbrush cleaner. You're going to need these as much as you need paint. Vallejo make big bottles of them that aren't that expensive and I recommend using those products.


With the 0.3 needle, thinning to about 50/50 paint to thinner seems to work quite well. sometimes 2/3 paint to 1/3 thinner is right, depending on the paint consistency. With this airbrush you can mix straight in the bowl as it isn't too sensitive. I've since bought a finer 0.15 needle brush and it won't take that kind of punishment (it clogs easily as it is much finer). The basic KMS airbrush is a lot more forgiving!


The one thing I would recommend is using Vallejo paints with an airbrush. You don't need the pre-mixed airbrush paint specifically, but they flow a lot better than Citadel paints and seem to be a lot better engineered for airbrush use.


I also recommend starting the airflow when the airbrush is pointed away from the model as sometimes flecks of paint can clog in the nozzle and then you get a scatter-gun blast of flecks when you restart the flow. It is a small thing, but it can ruin the finish of your model, so it's worth remembering, especially if you were coming back for that last highlight!


The compressor does get hot and can vibrate across the floor - luckily at the low pressure you'll be using these problems are mitigated quite a lot and it won't really move. It also comes with an inbuilt moisture trap which seems to work reasonably well. The moisture trap basically removes any water that gets into the line, which in theory stops excess water getting into your paint or spraying out of the end unexpectedly. Unfortunately this can still happen and I plan to invest in a better one at some point.

I did a few test pieces of scenery before I took to painting any actual models. I'd recommend it while you get used to using your airbrush as the trigger mechanism is a bit sensitive and you don't want to blow a massive load of sticky paint all over your model!

After reading Angel's book I wanted to try my hand at painting a TAG from Infinity (big robot about the size of a Daemon Prince). I followed the guidance in the book about adding layers of highlight using the airbrush and it came out really well. It was a steep learning curve though, so be prepared if you're getting into airbrushing!


The progress after my first night of airbrushing. I've outlined these panels in black and white to create a metallic look with an ordinary brush after the airbrushing was complete. 

All of the blue armour and the sword was airbrushed with the FoxHunter KMS

The one thing I would say is don't expect to get great results if you can't get them with a brush. The real advantage of the airbrush is speed and the ability to get smooth blends without tears. After that though you're still going to have to finish the model off yourself, so you can't throw away your fine detail brushes yet!

That said this is a fantastic kit for the money - whether you want something to basecoat with, or to paint your tanks and larger models it really is very good. The best part is that it all comes in one box, so there is no need to shop around or wonder what type of air hose you need as it comes with one!

Verdict:


09/10 - Perfection on a budget. You're going to need something better with time, but as a starting kit you can't go wrong.


To say I'm happy with the results is an understatement.


Friday, 4 March 2016

PanOceania Seraph

Airbrushing a PanOceania Seraph


I recently started playing infinity. This is my finished Seraph which was airbrushed with Vallejo paints and an incredibly cheap £60 Fox Hunter KMS airbrush. As my first venture into airbrushing I highly recommend that kit for the price it is at the moment on Amazon. The only drawback was the limited precision afforded by the airbrush itself, luckily the Seraph is quite a large model (at about the size of a Warhammer Daemon Prince).

I really can't take all the credit for this model, not just because I didn't sculpt it's awesome Gundamyness, but because the paint scheme was both inspired and copied from Angel Giraldez's "How To Paint Miniatures From A-Z", which is a great reference for intermediate and advanced painters looking to get into airbrushing.